Jeep Patriot Forums banner

Main antenna cable replacement

20K views 30 replies 8 participants last post by  Metaxa  
#1 · (Edited)
I've been having some electrical issues lately with a buzzing solenoid type of sound behind the dash. I have the 130 radio set up and while in the car with the key in my pocket if I turn on the lights or put the key in or out of the ignition or push the cd eject button or the time button or even my hazard lights I get a quick buzz sound from behind the dash. Basically anything that draws power without inserting the key. Oddly turning on the front dome lights don't seem to cause any noise. Each the actions stated above must have a 10 to 15 second pause from one other for the buzz to be heard otherwise no sound is heard. With the engine running no buzz is heard while performing any of these actions.

Well today I noticed that there was a light crackling static sound in the background of every FM station that was never there before even with my 14" stubby that I've had on for the last 3 years. Here is the kicker its only present when the engine is running. When shut off it disappears.

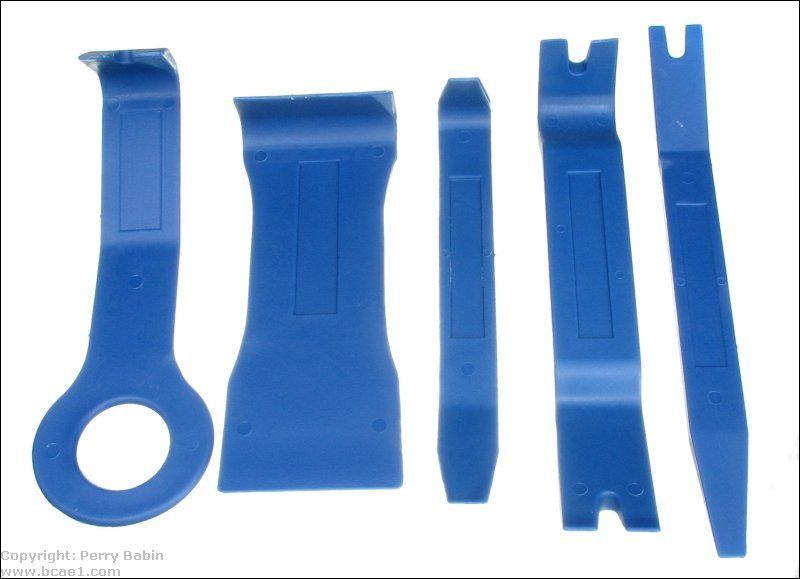
I decided to swap out the stubby and re-install the factory antenna to see if there was any change but I was having a hard time loosening the antenna when all of a sudden it snapped leaving the bolt part inside the base. For anyone that has one of these stubbys will know that the adapter is a two-sided bolt with one end going into the base and the other end into the antenna. It looks as though the bolt in the antenna was rusted in there pretty good causing me to snap the other end.

My first question is would rust inside the antenna be causing all these electrical issues and the static on the radio? And secondly, how the heck do I remove the snapped bolt from inside the base?
 
#2 ·
Start soaking it with PB Blaster (my personal favorite for rusty bolts), then see if you can find a reverse drill bit. Hit it with the PB over a day or two then do your best to start drilling the center of the bolt. A lot of times the reverse drill bit by itself will catch/grab the bolt and turn it right up and out. If it doesn't grab it by the time you drill all the way through, then you'll need an easy out to try and extract it. You've got nothing to lose by trying. Worst case is you'll be ordering a new base from the dealer.
 
#4 ·
Thanks guys!!

I've never heard of a reverse drill bit before. I assume the drill is kept in forward rather than reverse otherwise that would negate the reverse drill bits action correct??

Obviously I would want to keep the bit smaller than the bolt to avoid ruining the base threads but how much smaller> I would guess a 1/8 or 3/16 bit would do.

Would you know if this rusting could be causing electrical issues?? I would think not simply b/c everything seems to be ok with the engine running. It might though explain the static.

I could be devious and go to the dealer and just say I was on the hwy and all of a sudden my antenna went flying. They don't have to know I had a stubby on there. :D
 
#5 ·
I believe you run it in reverse, so that as the bit starts to sink in it will spin everything counter clockwise, which will cause whatever it is you are drilling into to start to back out. If you look at the grooves in the bit you should be able to tell, but either way... it only works one way.
 
#6 ·
Ya, that is how my kit works.

Is there any of the adapter sticking out of the vehicle base plate?
I would think a little penetrating fluid like the PB, some time, maybe a little heat, a pair of vice grips and some vibration would do it without drilling it out.

Clamp the vise grips to the stump, knock on the side of the vice grips as you apply even pressure turning it out. Just tap, tap, tap.

Also, frozen nuts, etc often will move in a bit, like a rust frozen yard tap...I almost always am able to "crack" the rust by first giving it a tightening turn, then backing it out.

I just switched my Xmas antenna back to my stubby that has an adapter...and a good coating of Fluid Film. No rust, eh?
 
#7 ·
Unfortunately the break is below the edge of the base so there is no way to grab it with pliers. I went to Home Depot today to inquire about a reverse drill bit and the guy who seemed like he knew what he was talking about looked at me like I had four eyes.:doh:
 
#11 ·
Well so much for plan "A". After letting it soak with PB Blaster for a couple of

days I went ahead and tried to remove the bolt and it just wouldn't budge. I

ended up snapping the drill/extractor bit right inside the bolt and that was it.

I removed nut and plastic base to expose the metal socket underneath that

snaps onto the fender and looks to be a very small inexpensive piece. I

popped the hood and reached in from the top of the fender and could feel the

antenna cable. I of course just need the threaded socket that comes through

the fender and clips in. I assume the antenna cable detaches from this socket

and I don't have to go fishing the cable all the way to the back of the radio.

Anyone know what this part number is?
 
#13 ·
Thanks Metaxa those links were a great help!!


For future reference the part number for the antenna base only-which is the

threaded female portion that the antenna mast screws into and comes up

through the hole in the passenger front fender is

05064279AC. According to the dealer this will include a small

piece of antenna cable that I guess plugs into the main antenna that goes to

the radio. The link below shows the diagram. If you click the diagram "quick

view" above the header "Antenna-BASE-Antenna" its shown as part #1. If

however you click "Antenna-BASE-Antenna" first and scroll down to the

diagram its shown as #5.


I know we have a lot of members with the short stubby antennas & this info

may help someone down the road. Word of advise-spray some Fluid Flim on it

every so often to avoid what I just went through. BTW is cost me $25 CAD.

Merry Christmas and Happy New Year to all our members!!:D


Here is the link:

http://www.mopar.com/jeep/patriot/2010/shop/316952/27/3169/
 
#14 · (Edited)
good on you to have solved the problem.

I'd coat the adapter entirely with dielectric grease (you don't need a lot) then screw it into the antenna, then screw it into the base on the vehicle and THEN give it a shot of Fluid Film.

At least that is what i did, you don't need much of either the grease or the FF. Any excess FF will just wipe off after you have left it overnight to creep down into wherever it gets to.

I R&R'd my stubby for my Xmas antenna and everything looks as new...no corrosion at all. I re-applied a smidgen of dielectric grease to the adapter portion going into the base before installing it back after the Xmas antenna came off.

It is the adapter that is the problem...it is simple pot metal where the stock antenna threaded part is stainless (I think...it sure looks to be) and the base is probalby better metal than the adapter. So if you grease the adapter on both ends you get it into the threaded, hidden portions of both the antenna and the base. Then the FF coats everything once assembled.

(I could repeat that a different way, if you'd like? LOL)
 
#15 ·
I'm still waiting for the antenna base to come in so in the meantime I've been looking at the task at hand and I'm not sure how to go about replacing the antenna base.

The ring easily screws off and then the plastic covering just slides off exposing the metal female base. There is a small clip that you lift up slightly and the entire base drops down through the hole in the fender.

My question is how do I get inside the fender to disconnect the other end of the cable, as there is no room inside the engine compartment. I'm thinking its one of two routes: removing part of the splash shield in the wheel well and work from below or removing the entire fender which seems to be quite the job.


Any one done this before?
 
#16 · (Edited)
I picked up the radio antenna base today from the dealer and me thinks this is

going to be a very involved job. I say this b/c the antenna cable that's attached

to the base has got to be 2.5 ft long and there is a round rubber grommet on it

which indicates to me that this cable will go through the firewall at some point

and then plug into back of the radio as here is a male plug in on the end.

Anyone who has changed or upgraded their stereo know where the antenna is

fed through? Dealer says its at least 2 hours work!!:mad:
 
#17 ·
Yikes...2 hours with a well lit shop, factory manual on the computer and a full complement of tools. Never mind daily experience...
Driveway or home garage is a world apart from that.

Maybe try talking with the kids who install stereos and such at Future Shop, Best Buy, any large automotive electronics retailer...some of those kids are savants at what they do and might enjoy working outside the box a bit.

You could maybe get it done for a loaded Pizza Hut card and a prostitute.
 
#18 ·
Check this thread.

I tried this location when I ran the power cable for my sub and gave up, used the driver side instead. Maybe you'll have better luck than I did.

Either that or a prostitute.
 
#19 · (Edited)
The dealer said you most likely will have to remove the wheel well splash shield where you'll probably see where the cable enters into the cabin. If you open the passenger door and look in between the front fender and door you will see a foam backing strip that runs the full length of the fender. I believe just behind this foam covering is where the antenna enters through the firewall. When dropping the glove box it would be on the right side. If the weather is good this weekend I'm going to try to tackle this myself.

What to you guys use to pry off the radio bezel? Do the radio knobs and the 3 large knobs have to be pulled off first before removing the bezel?


Thanks.
 
#20 ·
What to you guys use to pry off the radio bezel? Do the radio knobs and the 3 large knobs have to be pulled off first before removing the bezel?


Thanks.
Re: the knobs, no, to removal, on later models there simply is an electrical snap plug on the backsdie that you remove. One for the HVAC controls and I'll assume on for heated seats which I don't have.

The bezel comes off leaving the entire radio behind, except again I'm talking about my 2011, I forgot to look at your model year and its not available to me in this response window.

I have a kit like this (mine is red)
Image

They are nylon reinforced plastic prybars and they work well.

Lots of members remove the bezel simply by grabbing it at the bottom and working their way up...its just held on with plastic snaps, no moving parts.
 
#21 ·
Thanks Metaxa!! Where can I get this pry bar set as it would be handy to have in my tool box?

I can't seem to find a picture of a Patriot with the passenger side front fender removed. That would be ideal to see where this cable enters the cabin.
 
#24 · (Edited)
#25 ·
Ya, SpaceJeep, Princess Auto for you easterners but watch out, regular price for a good set, nylon reinforced plastic not just plastic is around $35.

But, they go on sale a lot. Or often...whatever.

I paid $14 for mine, down from $35 just before summer last year.

And a little secret...I often ask if the last sale price is in the computer POS machine and if it is I ask if they would be prepared to sell me one right now for that sale price.

Haven't been turned down yet.

I'm not poor, just cheap, eh?
 
#26 · (Edited)
Princess Auto sells a set of 5 for $14.99 and its reinforced nylon.

http://www.princessauto.com/pal/product/8309411/Trim-Tools/5-pc-Trim-Remover-Set


Looking at the main antenna cable its 36" from tip to tip but from the rubber grommet there is only 21" of cable to get to the radio which doesn't seem quite long enough. Is there antenna adapter cable that comes out the back of the radio and plugs into the main antenna?

Here are pictures of the newly purchased cable:
 

Attachments

#27 · (Edited)
UPDATE:

I went ahead and installed the antenna base today and it took me all of 1 hour to do.

Step 1:

Turn the steering wheel all the way right to give you room to take out just the 2 push pins and 4 screws holding down part of the fender liner closest to the passenger door. If you have installed the Jeep molded mud flaps it comes off too as it uses the same screws.


Step 2:

Pull the liner out from behind where the mud flap was and just above it. This will give you plenty of room to see where antenna cable is and the inner fender grommet it goes through as it enters the cabin.

Step 3:

Lower the glove box and reach in to the right and feel around for a thick wire harness and follow it the side wall. You'll feel a hole where some wires run through including the antenna cable. I had thought b/c the new cable was so short it would have to cut right across the back of the glove box straight for the radio but instead it comes through the hole and the goes straight down to the floor behind the plastic side panel that goes across the base of the door.


Step 4:

Remove the 1 plastic threaded screw holding the side panel down and then just pop it out just far enough to expose the wire harness behind it. You will see the antenna cable come down and right at the end there is a foam covering the connection. Just peel this back and now you can unplug the antenna from the main antenna harness.


Step 5:

Unscrew the antenna base nut and then remove the plastic base that rests on the fender. This will expose the inside of the antenna base. There is a clip that you lift up and the entire base then drops down into the fender. You can catch it by putting your hand inside the fender from below where you have made room by moving the wheel well liner. Now pull out the cable gently as it has to snake its way out from inside. The rubber grommet will automatically pull off and expose the round cut-out in the inner fender b/c its fastened to the cable. Now you can dispose this antenna.


Step 6:


This is where I lost a bit of time but with the aid of a friend its a piece of cake. Take the new antenna base and from below through the liner pop it up through the hole in the fender then grab it as it comes through. Pull up on it and it will click into place. Re-install the plastic base and nut and you can even screw in the antenna mast if you like. This end is now complete and now comes the tricky part.


Step 7:


The connection end of the cable has to go through the outer fender hole then there is a gap and then a second hole that you can feel on the inside behind the glove box. What I did is I cut a 6" piece of wire and wrap it around the end of the cable and straightened it so that it was a couple of inches ahead of the connection end . This works great as a guide as you feather it through both holes. Now this is where its handy to have a friend. As one is feeding in the cable the other has his finger on the inside waiting to feel for the wire. It takes a few tries but it will eventually come through. Pull it all the way in as the guy outside fits on the grommet. Bring down the cable, remove the 6" wire guide and plug it in.


Re-install the side panel and plastic screw and put back the glove box. You are now done on the inside. Pop the liner back in and re-install the 2 push pins and 4 screws and you are done.

And to think the dealer wanted 2 hours and a couple of hundred $$ for the job-pfffttttt!!:mad:
 
#29 · (Edited)
It sure does its very satisfying. The radio static is gone but that annoying sound coming from behind the dash is still there. I don't think this noise was always there b/c I'm sure I would have noticed it before.

When sitting in the car with the key in your pocket and the interior dome lights faded out after getting in try turning on the headlights and listen for a buzz noise behind the dash. Or, try pressing the time button on the radio and as the time is displayed a buzz is heard behind the dash. Or, press the hazard button and it buzzes too. It seems when any power is called upon there is this buzz sound behind the dash. When performing any of these tasks you must wait 10 seconds in between for the buzz to be heard. Along with this buzz a pop sound is heard coming from the tweeters on the dash (BA system).

When I start the car and as soon as the radio time or station is displayed the buzz occurs. I have a co-worker who also has a 2010 Patriot maybe I'll check hers out to see if this is a common Patriot trait.

Can anyone else confirm?
 
#30 ·
UPDATE #2:

I had a chance to sit in a co-workers 2010 Patriot yesterday to see if a static pop noise heard through the speakers along with the buzzing relay sound coming from behind the dash. Lo and behold she also has the static sound but the relay buzz sound is not present.

If I can get members to try this on their Patriots it would be a great help before I take it in.

Procedure goes like this:


When sitting in the car with the key in your hand and the interior dome lights faded out after getting in try turning on the headlights and listen for a buzz noise behind the dash followed by a static pop sound heard through the speakers. Or, try pressing the time button on the radio and as the time is displayed a buzz is heard behind the dash followed by the pop sound. Or, press the hazard button and it buzzes with static too. It seems when any power is called upon there is this buzz sound behind the dash followed by the static pop sound through the speakers. When performing any of these tasks you must wait 10 to 15 seconds in between for the noises to be heard.


Thanks!!:)